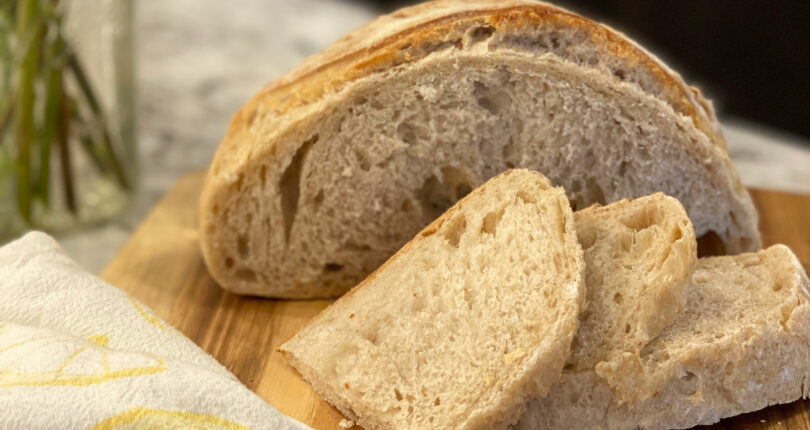
There’s something romantic about a freshly baked, crispy golden boule or batard. Not only are spongy slices of sourdough the perfect toasted vessel for creamy butter, but they are the best accompaniment for a countless number of entrees.
I always wanted to try my hand at sourdough bread baking. The lack of a starter and the time factor — 24 hours to make a loaf — kept the task at bay. But when my son nursed a sourdough starter in high school chemistry (which masqueraded as a food science course), I named the jar of bubbly goo “Harold” and studied what to do next. Conveniently, I had also found myself stuck at home during a pandemic with extra time on my hands. My studies landed me on the internet, where there are more videos and articles on sourdough than I could review in a lifetime. I read through a few recipes, joined a sourdough Facebook group, and jumped into the process.
While making sourdough is science, it is by no means perfect. Sourdough relies on wild yeast and lactic acid bacteria — rather than baker’s yeast — to leaven the dough; but many variables play into the development of a loaf. One of the most impactful variables is the temperature of your kitchen.
Dough will rise faster in a warm kitchen and slower in a cool one. This is particularly important because underproofed bread results in a dense, gummy texture (a.k.a. “crumb”) and overproofed bread results in a flattened loaf (bread without spring).
And that’s just the beginning. Hydration, the type of flour, and even the microbes in your kitchen can impact crumb.
No preservatives. One of the things I love about sourdough is that it has only three ingredients: Flour, water, and salt. What about the starter? It’s just fermented flour and water.
Hydration. Most sourdough recipes are written as a baker’s percentage. This is where some basic math skills and a baking scale will come in handy. Baker’s percentage expresses a ratio in percentages of each ingredient’s weight to the total flour weight. Hydration typically varies from 65% to 75%. The higher the hydration, the more open (bigger holes) the crumb. Dough with higher hydration is also more difficult to work.
Flour. Flour is another impactful variable. I started with white bread flour. It is the easiest when it’s time to work the dough. The high protein content of bread flour helps your dough develop a strong gluten structure that gives it shape.
There is so much more to the science of sourdough, but it’s time to get baking. My best advice is just do it! Find video examples of techniques (e.g., stretch and folds) on the internet. I recommend watching The Bread Code channel on YouTube. Join a sourdough group on Facebook and ask questions. Read recipes. Don’t let anxiety, the metric system, or time stop you from creating one of life’s most tasty treasures!
DID YOU KNOW? Wild yeast in the starter produces carbon dioxide, creating bubbles in the dough that make it rise. A homemade loaf is richer in nutrients than a store-bought loaf containing preservatives, and it is generally easier to digest. Consume or freeze homemade sourdough within 5 days of baking — it doesn’t have preservatives to prevent spoiling.
Make your Own Sourdough Starter
How long will it take?
Once established, maintaining a starter isn’t as intensive as you might expect. In its infancy (the first four to six weeks of life), the starter requires daily feeding. However, once your starter has matured, it is possible to leave it in the back of the refrigerator for weeks at a time without offering it sustenance until a day or two before you need it.
Is it difficult to make?
Once I got the hang of it, I realized the process can be as simple or as complex as I want to make it. Don’t overthink it. When will it be ready to use? If you make your starter now, it should be ready to use in about a month.
What will I need?
The key to making a starter is to start with simple ingredients that are as pure as possible.
Ingredients
• Use unbleached, all-purpose flour (at least in the beginning)
• Use filtered water (such as from a refrigerator)
Supplies
• Have two to three glass quart jars and a wide rubber band
• Use a baking scale, although you can make bread without one
To make/maintain your starter:
Days 1 – 2: Make the Starter
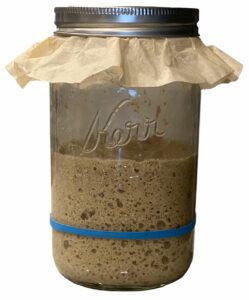
Combine unbleached, all-purpose flour and filtered water at a ratio of 1:1 in a quart jar. I suggest using 20 grams of flour and 20 grams of water. In my kitchen, this is about 2 tablespoons of flour and 3 teaspoons of water. Stir it with a scraper, scrape down the mixture off the inside of the jar, and place a rubber band around the outside of the jar to mark the top of the starter. Put a lid on the jar, and let it sit at room temperature for 48 hours.
Day 3: Feed Your Starter
Grab your second jar. Following a 1:1:1 ratio, combine 10 grams of starter; 10 grams of unbleached, all-purpose flour; and 10 grams of filtered water in the clean jar. Stir, scrape, screw on the lid, and mark the top of the starter with a rubber band.
Day 4 – 42: Keep on Feeding
Repeat every day. Each day, you will have 10 to 20 grams of leftover starter called “discard” from the previous jar. Throw away the discard from the first two weeks, as it might have an abundance of bad bacteria and isn’t mature. Otherwise, the reason to discard the leftover starter is so that you don’t unnecessarily waste a large amount of flour during this process. With the 1:1:1 ratio, the amount of flour needed could add up if you don’t discard some starter. After the first two weeks, you can save the discard in a separate jar and keep adding discard to it until you have enough (1 cup) to make a discard recipe — you can find several online, just search “sourdough starter discard recipes.”
Each day, your starter should become more mature in both sour flavor and vigor until it doubles a few hours after you feed it. While you can use it for baking sourdough bread just two weeks after its birth, it might not be mature enough to do its proper job of leavening until after four to six weeks of daily feeding.
Maintenance:
After four weeks, I switched from using unbleached, all-purpose flour to organic dark rye flour for my starter. It makes a denser starter, but it also tends to be more vigorous, and I like the whole grain. I also add a little extra water so that it isn’t so thick. This is definitely one aspect where it’s less “science” and more “art.” I did a daily feeding using rye for two weeks. At week six, I began storing my starter in the refrigerator. I now feed it every one or two weeks and let it sit at room temperature for 2 to 4 hours to rise before putting it into the refrigerator for the week.
What’s next? Time to make bread. Find Rita’s sourdough bread recipe here.